Users & Roles
Manage the backoffice user accounts your team logs in with, and the roles that decide what each person can see and do. Getting this right is the foundation of least-privilege access: everyone gets exactly the access their job needs, and nothing more.
Key terms
Define these once here; the rest of the page uses the short forms.
Two-Factor Authentication (2FA) is a second authentication factor used during sign-in. A Time-based One-Time Password (TOTP) is a rotating code generated by an authenticator application. The Content Management System (CMS) is the backoffice area for managing player-facing content.
| Term | Meaning |
|---|---|
| Role | A named set of permissions. Users are granted access by assigning them one or more roles. |
| Two-Factor Authentication (2FA) | A second login factor for operator accounts, on top of the password. |
| System role | A built-in role the platform ships with. Its details are read-only; only its Require 2FA for this role setting can be changed. |
| Custom role | A role you create for your own operator, with a permission set you choose. |
| Time-based One-Time Password (TOTP) | The rotating 6-digit code from an authenticator app used as the second factor. |
| Content Management System (CMS) | The area for managing games, banners, carousels, pages, and menus. |
Users
Viewing users
- Open Users under the Settings section of the sidebar.
- Review the list of backoffice users.
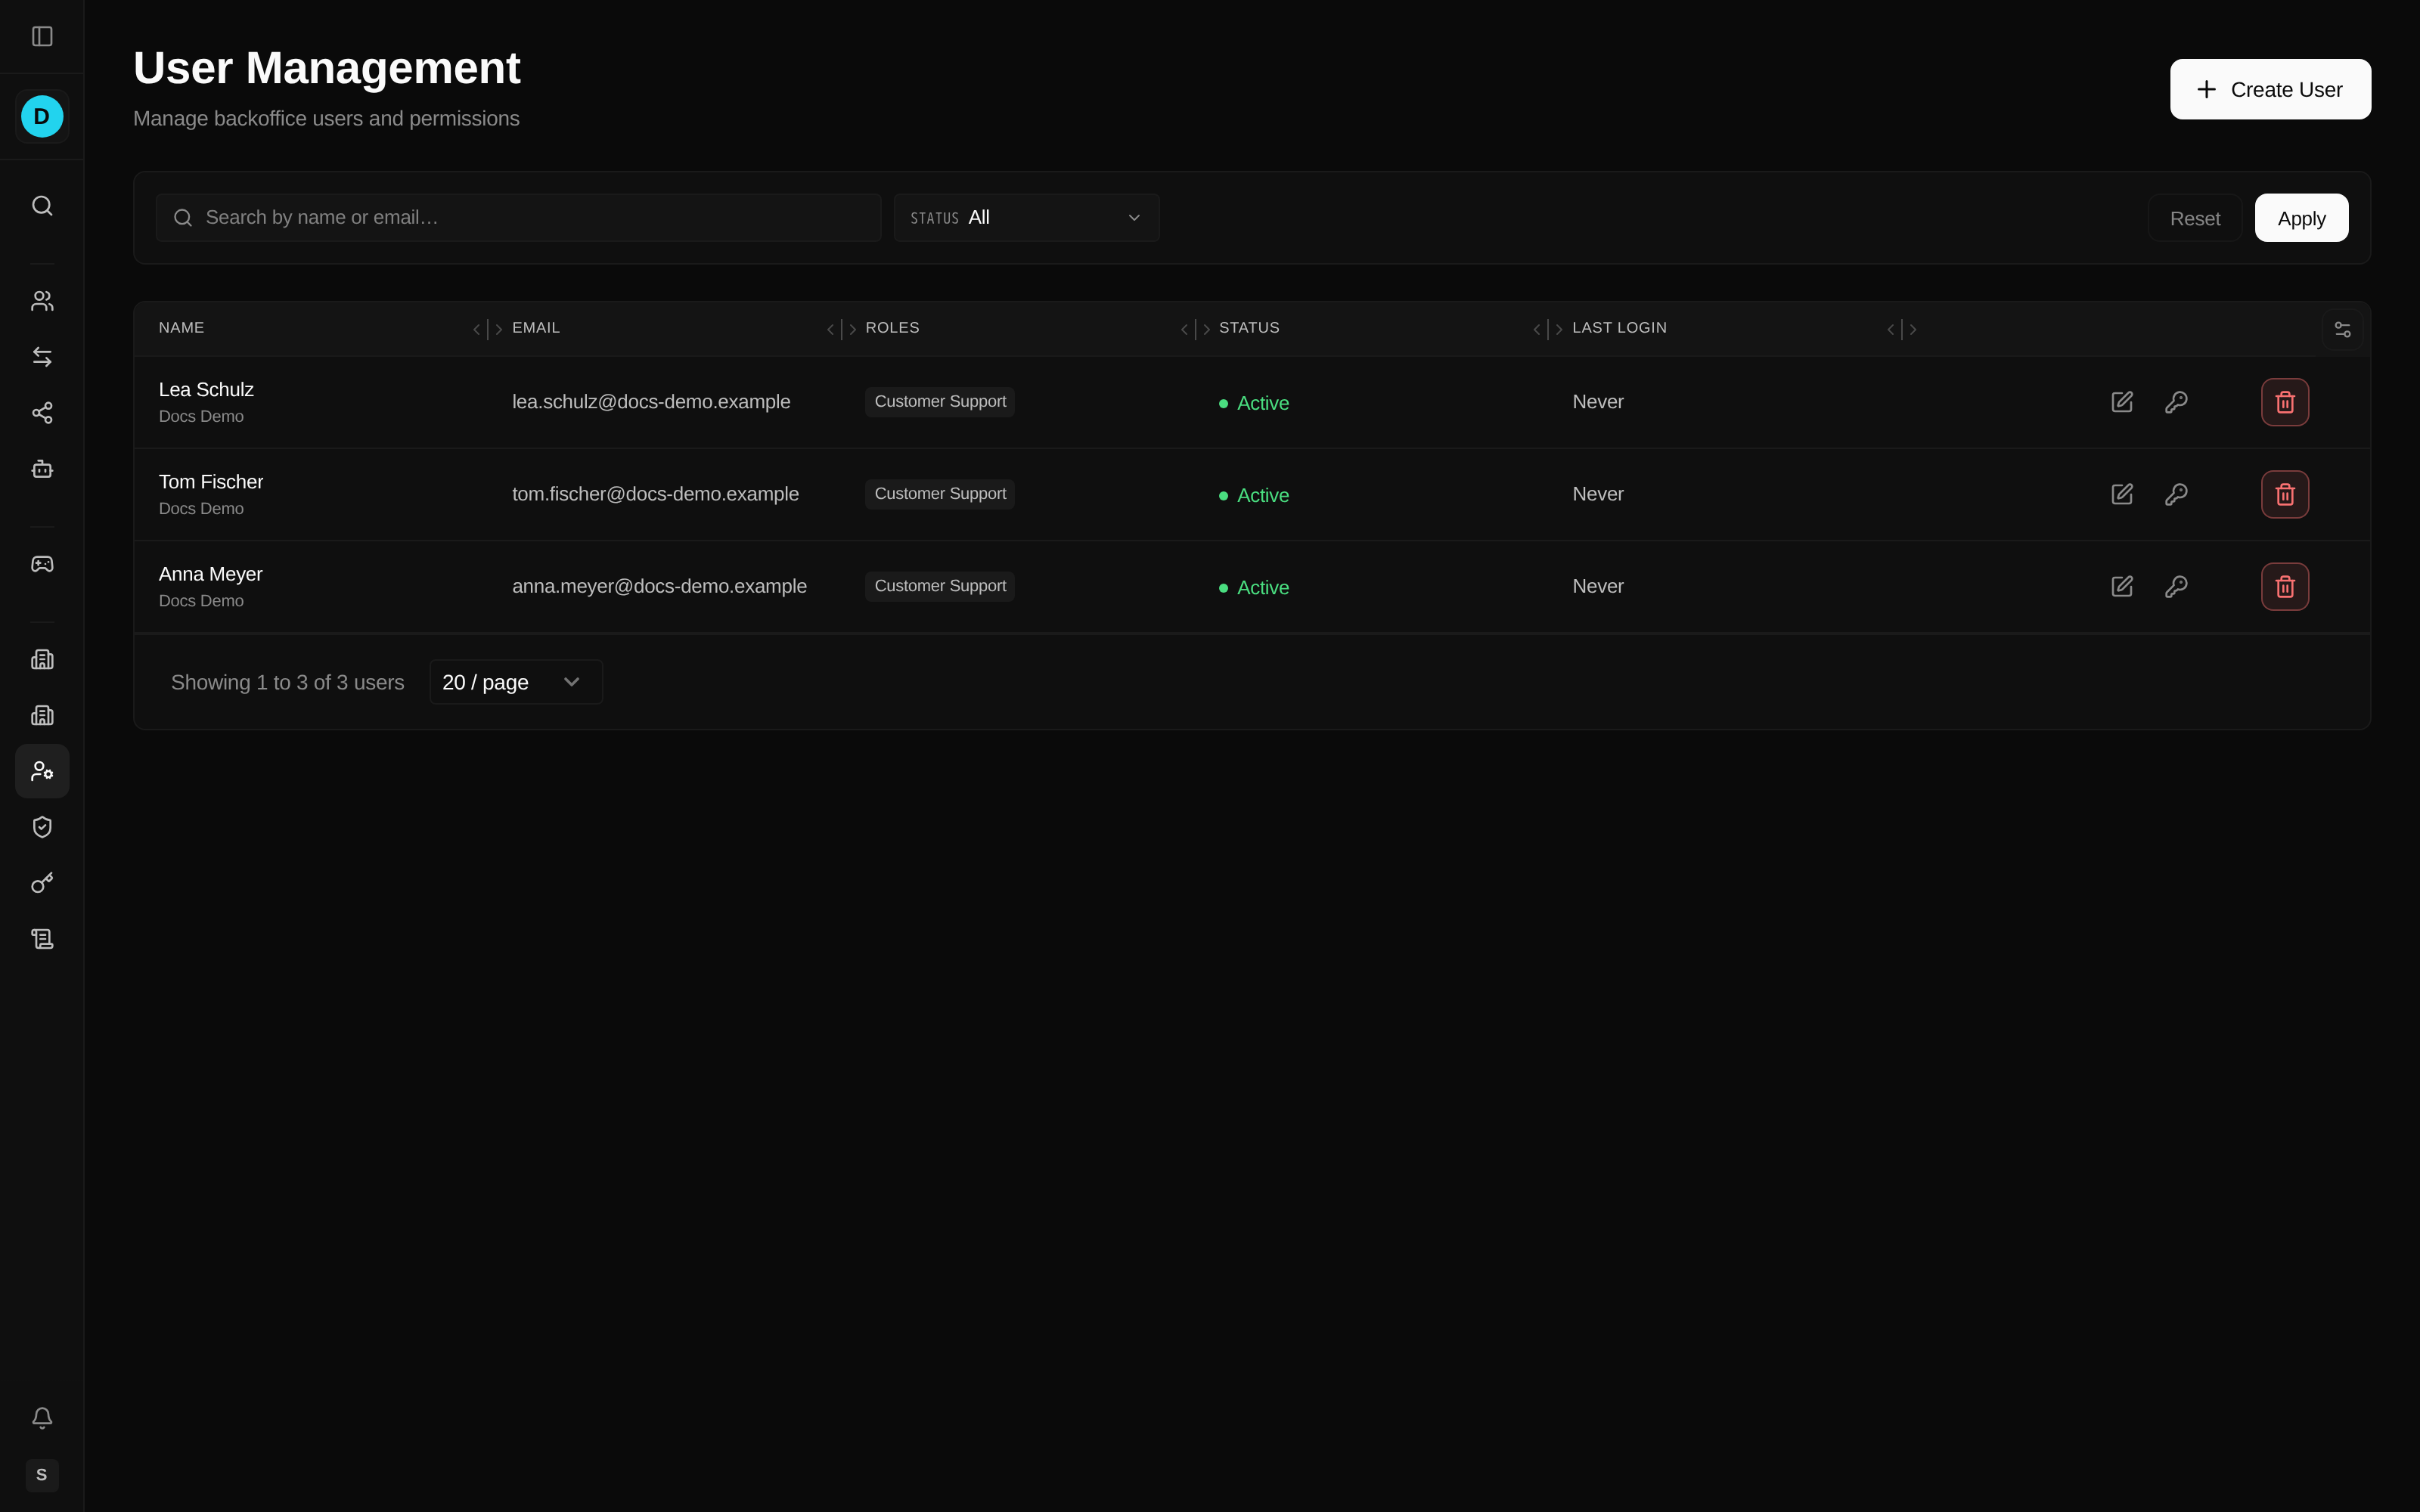
Keeping this list current is how you know exactly who can reach the backoffice at any time. The list shows Name, Email, Roles, Status, and Last Login. Users are identified by their email address, which is also what they sign in with. Accounts with unrestricted platform access are marked with a Super badge. Use the search box to find a user by name or email, and the status filter to show only active or only inactive accounts.
Creating a user
Create an account so a new team member can sign in with the access their role requires.
- Click Create User.
- Fill in the details:
- Email — used to sign in.
- Password — the initial password. Share it securely and ask the user to change it after their first sign-in.
- First Name and Last Name.
- Active — leave on so the account can sign in immediately.
- Super Admin — available only when a super-admin creates the user; grants access to every operator and brand.
- For a standard (non-super-admin) user, also set:
- Operator — the operator the user belongs to.
- Brands — one or more brands the user may work with (at least one is required).
- Roles — one or more roles that define the user's permissions (at least one is required).
- Click Save.
Editing a user
Keep a user's roles and brand access in step with their current responsibilities.
- Click the edit (pencil) icon on the user's row.
- Update fields as needed.
- Click Save.
Deactivating a user
Remove access promptly when someone leaves or changes duties — the account is kept for the audit record, but the person can no longer sign in.
- Click the edit (pencil) icon on the user's row.
- Turn the Active switch off.
- Click Save. The user can no longer sign in, and their status shows Inactive.
Resetting a password
Restore access for an operator who is locked out or has forgotten their password.
- Click the reset-password (key) icon on the user's row.
- Enter and confirm the new password.
- The password is updated. Communicate the new password to the user securely, then ask them to change it after signing in.
Roles
Roles define what users can see and do in the backoffice. Assigning the right role is how you apply least privilege at scale — you manage access by job function instead of ticking boxes per person.
Viewing roles
- Open Roles under the Settings section of the sidebar.
- Review the roles and their permissions.
The list shows each role's Role (its name, its code, and a System tag on built-in roles), Description, Permissions (how many are granted), Users (how many are assigned), and Status. Search by name, code, or description to find a role quickly.
Built-in system roles
The platform ships with seven system roles as a sensible starting point. Their details are read-only — only the Require 2FA for this role setting can be changed — so you can assign them as-is or use them as a reference when designing your own roles.
| Role | Description |
|---|---|
| Super Administrator | Unrestricted platform-level access, spanning every operator. Reserved for platform administration. |
| Operator Administrator | Full access within a single operator's scope. |
| Brand Manager | Manages brand settings and content. |
| Customer Support | Views and assists players. |
| Finance Manager | Manages transactions and financial reports. |
| Content Editor | Manages CMS content. |
| Viewer | Read-only access. |
Creating a role
Create a custom role when a job function needs a permission set the built-in roles don't match.
- Click Create Role.
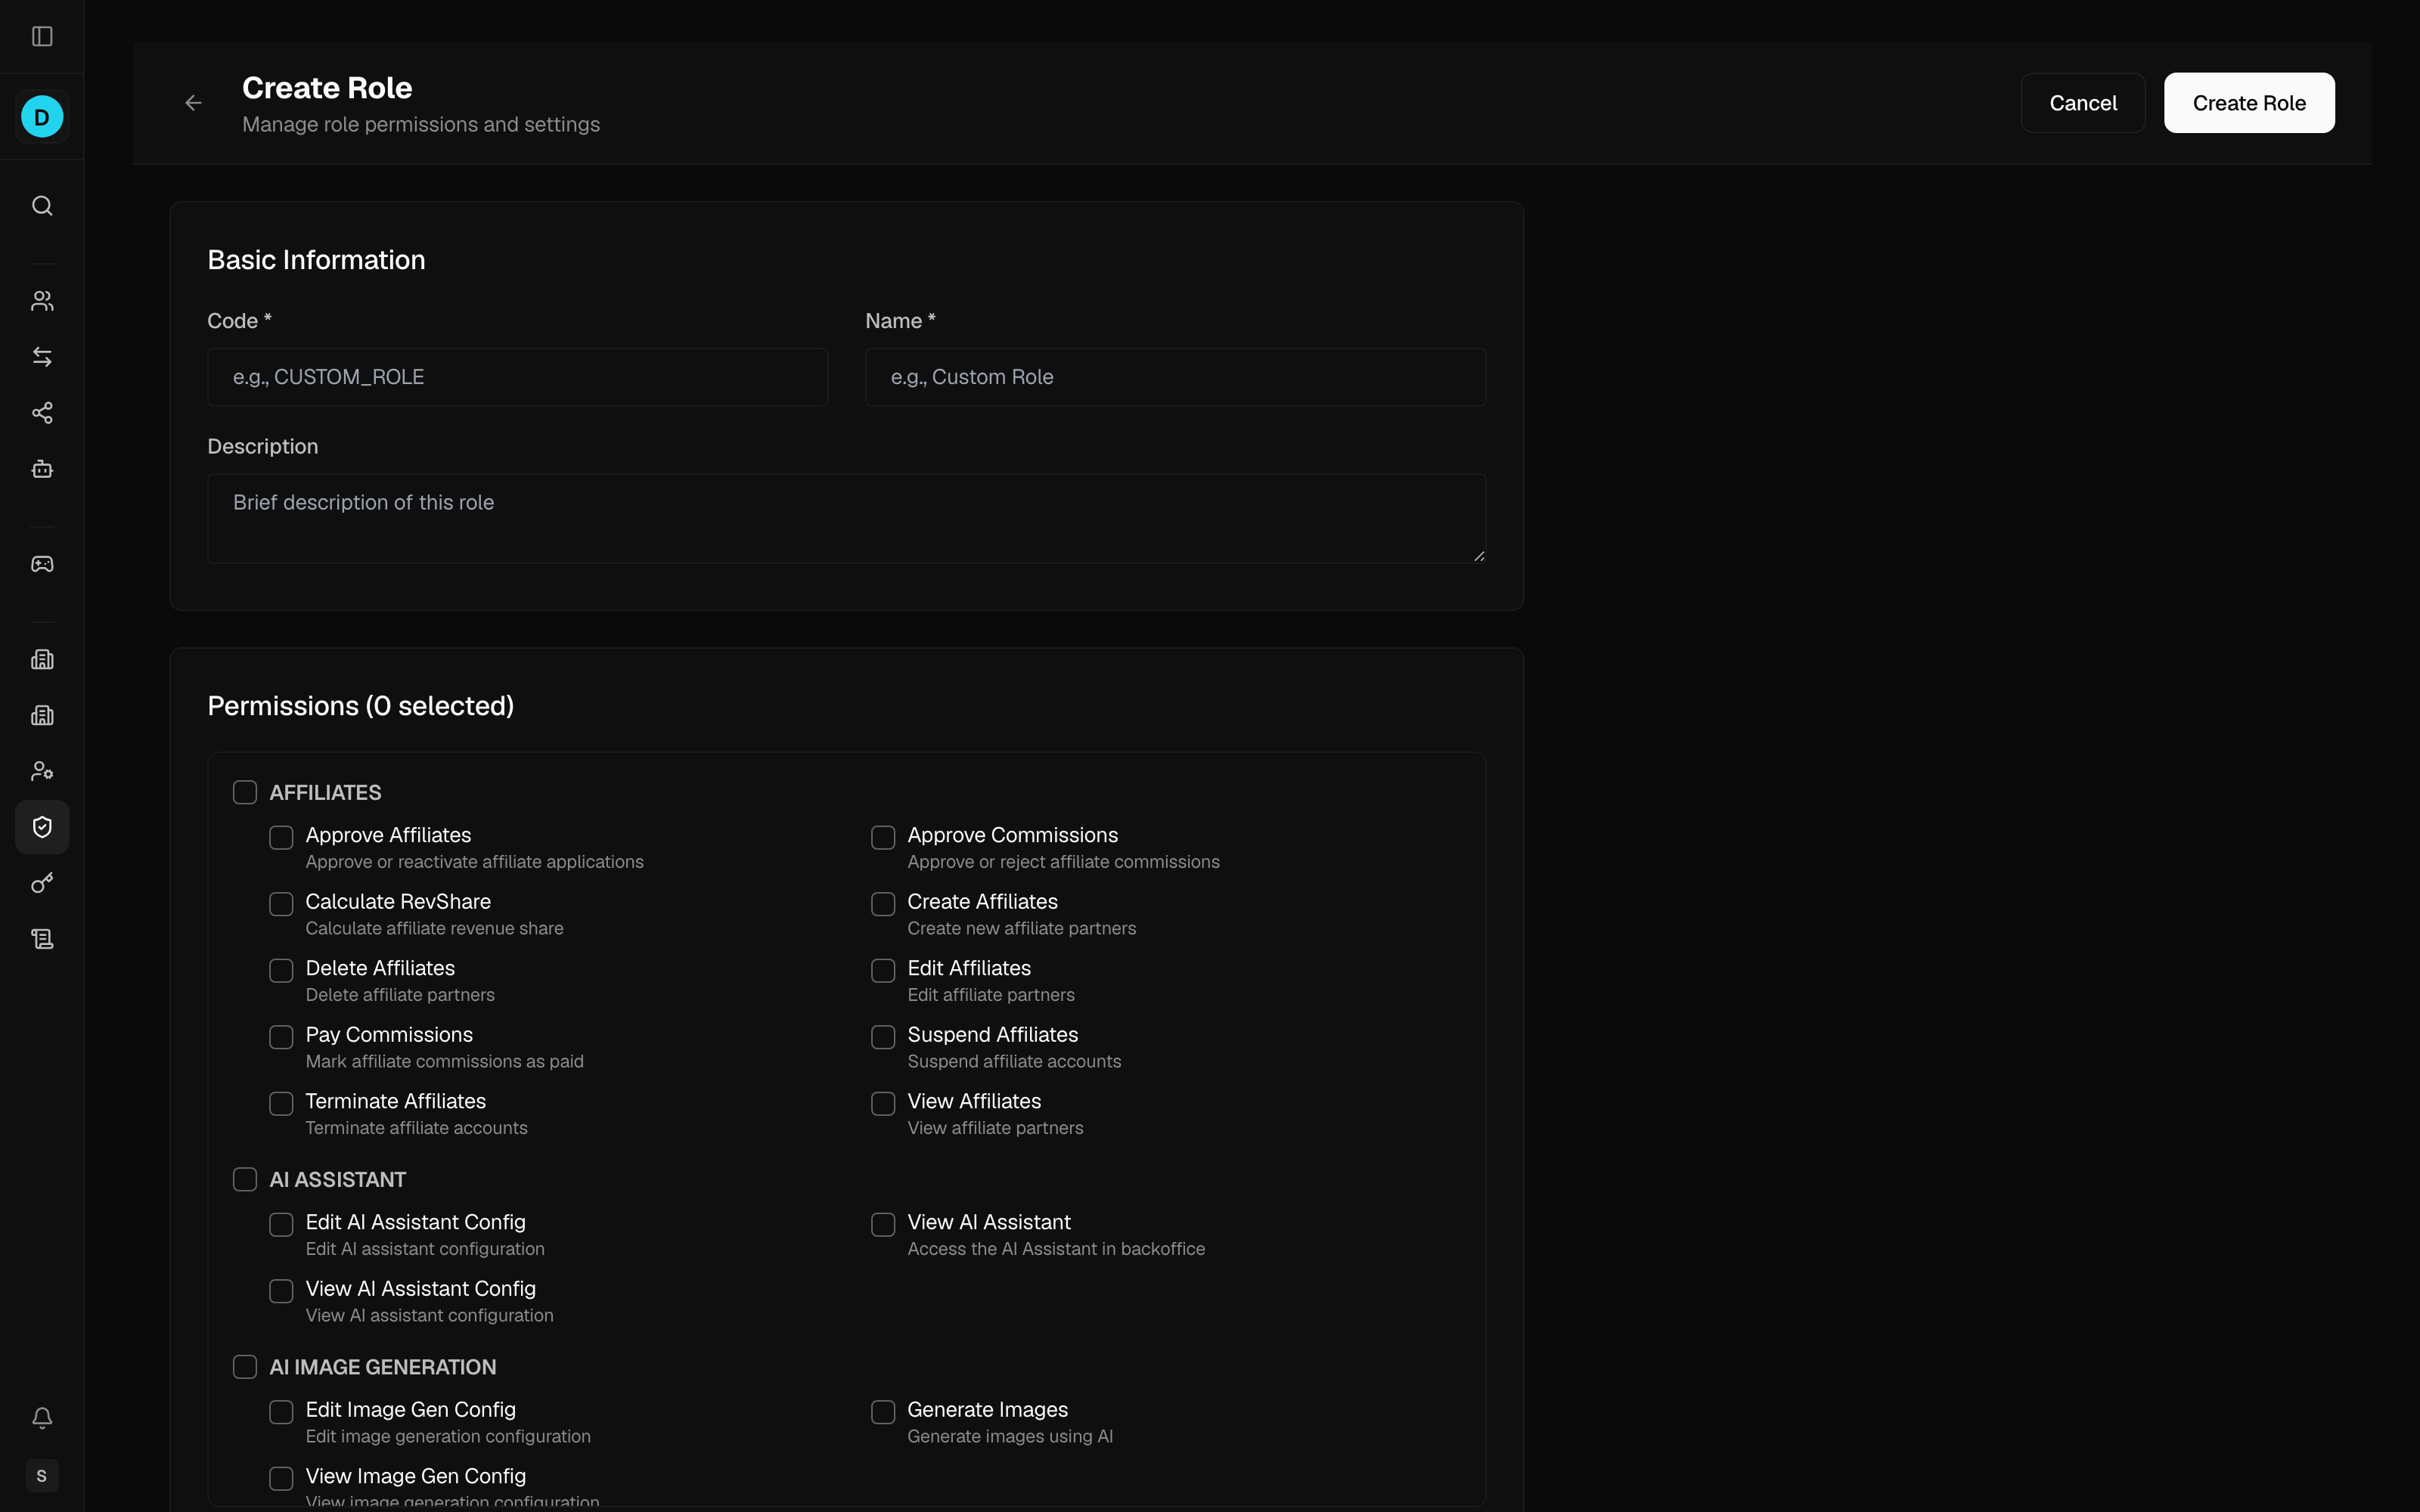
- Enter a Code (capitalised automatically, and fixed once the role is created), a Name, and an optional Description.
- Super-admins also choose the Operator the role belongs to.
- Tick the permissions the role should grant (see below).
- Click Create Role.
To start from an existing permission set, use Clone (the copy icon) on any role in the list — it opens a new role pre-filled from the original. Cloning copies only the permissions you yourself hold, so a cloned role never grants more than you can. System roles can be opened and viewed but not edited, apart from their Require 2FA for this role setting.
Role permissions
Permissions are grouped into categories so related capabilities sit together, for example:
- Player Management — view players, edit players, suspend or reactivate players, view transactions, and post balance adjustments.
- Bonus Management — view, create, grant, and forfeit bonuses, and manage campaigns.
- Content (CMS) — view, create, edit, publish, and delete site content.
- Automation — view and build workflows, activate them, and manage player segments.
- Administration — manage users, roles, brands, and API keys.
Further categories cover areas such as player tags, notes, fraud and risk, and identity verification settings. The exact set available depends on your platform configuration.
How permissions work
In the role editor, permissions appear as a checklist grouped by category. Tick a category header to grant every permission in that group at once, or tick individual permissions. Each permission is simply on or off — a role is the set of permissions you have ticked, and each permission is granted or withheld as a whole rather than by "view-only" versus "full" access levels.
Editing a role
Adjust a custom role's permissions as responsibilities evolve.
- Click a custom role's row (or its edit icon).
- Adjust the permissions and details.
- Click Update Role.
Changing a role's permissions affects everyone assigned to that role the next time their access is checked, so review the impact before saving.
Multi-factor authentication
MFA protects operator accounts with a Passkey or an authenticator code after the password. The Users list shows method counts and authenticator status, not another user's Passkey names.
- Self-enrollment. Add a Passkey or authenticator in Account Security. Confirm your password and an existing method when enrolled. Save and acknowledge recovery codes before activating the first method; additional methods share the same recovery set.
- Enforcing 2FA by role. Turn on Require 2FA for this role in the role editor to require the second factor for everyone in that role. Members are prompted to enroll at their next sign-in; anyone already signed in keeps their current session.
- Resetting a user's MFA. An administrator with the reset permission can reset another user, including an inactive account, but never themselves. Reset requires a reason and removes all MFA methods, codes, unfinished actions and sessions. It preserves password lockout and does not reactivate the user. Required MFA is enrolled again at the next sign-in.
See Multi-factor authentication for the full enrollment, recovery-code, and enforcement details.
Best practices
User management
- Use individual accounts — each person signs in with their own login.
- Apply least privilege — grant the minimum access each role needs.
- Review regularly — audit who has access on a set schedule.
- Offboard promptly — deactivate departing team members as soon as they leave.
Role design
- Keep roles focused — each role should map to a clear job function.
- Avoid overlap — don't create several roles with near-identical permissions.
- Document roles — use the description to explain when to assign each role.
- Test before rolling out — confirm a new role's access before assigning it widely.
Audit trail
Administrative actions — including changes to users and roles — are recorded in the audit log, so you can review who did what and when. Open Audit under the Settings section of the sidebar (available if your role allows it). See Audit Logs for details.